Managing workloads in OpenSearch Dashboards
You can monitor and control resource usage across your cluster in OpenSearch Dashboards:
- View real-time CPU and memory usage by workload group.
- Identify groups exceeding resource thresholds.
- Configure workload groups and auto-tagging rules.
- Set rejection thresholds for resource-based query control.
Prerequisites
Before you start, install the Workload Management plugin. For more information, see Installing workload management.
Monitoring workload usage
To monitor workload resource usage across the cluster, on the top menu bar, go to OpenSearch Plugins > Workload management. The workload management landing page is shown in the following image.
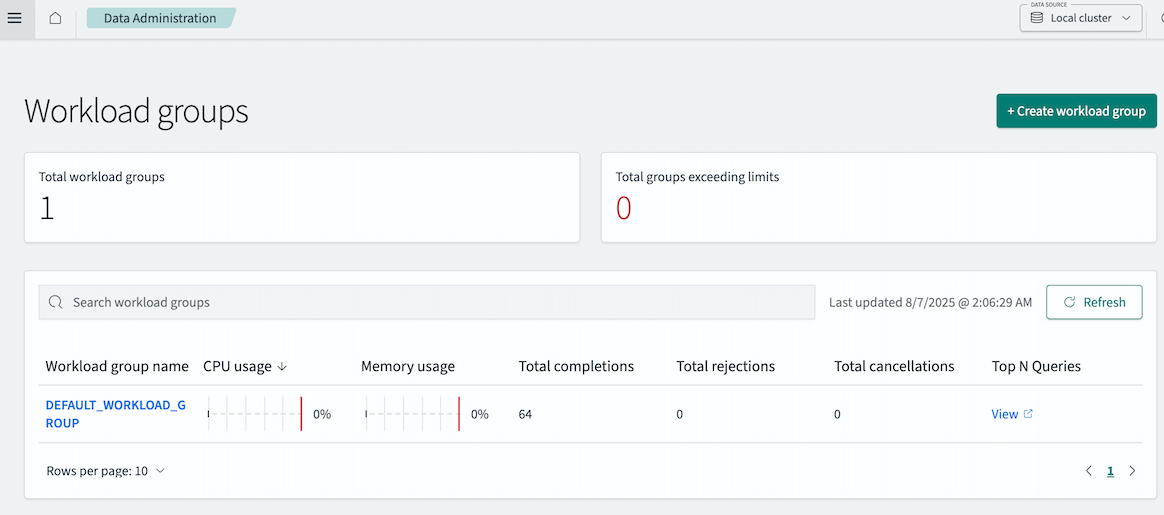
The Total workload groups panel shows the number of defined workload groups. The Total groups exceeding limits panel shows the number of workload groups exceeding thresholds.
The main panel provides workload information in an overview table containing the following columns.
| Column | Description |
|---|---|
| Workload group name | To view node-level workload group details and update configuration settings, select the workload group link. For more information, see Viewing workload group details. |
| CPU usage, Memory usage | Box plots showing real-time CPU and memory usage for each group across nodes. Thresholds appear in red. |
| Total completions | The total number of completed tasks associated with the workload group. A single query may result in multiple task completions, such as coordinator and shard-level tasks. |
| Total rejections | The total number of tasks rejected because of resource limits. |
| Total cancellations | The total number of tasks canceled before completion. |
Use the search bar to filter the table by workload group name.
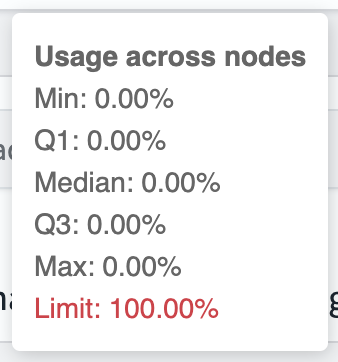
To view minimum, Q1, median, Q3, and maximum values, hover over the CPU or memory box plots. The information is shown in a tooltip, as shown in the following image.
Viewing workload group details
To view details for a specific workload group, perform the following steps:
- In the overview table, select the group name.
- To view the workload group statistics, select the Resources tab (selected by default). In this tab, you can view real-time usage and query statistics for the workload group, broken down by node.
- To view the workload group settings, select the Settings tab.
Creating a workload group
To create a new workload group, perform the following steps:
- On the workload management landing page, select Create workload group.
- In the Overview section, enter the following information:
- Name: A unique and descriptive name.
- Description (Optional): Briefly describe the group’s purpose.
The description is saved only if a rule is defined.
- In the Rules section, perform the following actions:
- Select the Resiliency mode. In Soft mode, queries may exceed limits if resources are available. In Enforced mode, queries are rejected when usage exceeds the limit.
- Add one or more Index wildcard patterns to define which queries are auto-tagged with this group. Any query that targets an index whose name starts with one of these patterns will be automatically assigned to this group. Separate multiple patterns using commas (for example,
logs-,metrics-). - To define multiple rules, select Add another rule. Use the trash icon to delete a rule.
- In the Resource thresholds section, enter the following information:
- Reject queries when CPU usage exceeds: Set a % CPU usage limit. For example, enter
10for 10%. The total CPU usage across all workload groups must not exceed 100%. - Reject queries when memory usage exceeds: Set a % memory usage limit. The total memory usage across all workload groups must not exceed 100%.
You must define at least one threshold (CPU usage or memory usage). Thresholds cannot be cleared once set.
If you initially set a CPU threshold but later want to rely only on a memory limit (or the other way around), you can achieve this by switching the group to soft resiliency mode. In soft mode, even if a limit is defined, the system allows queries to proceed as long as node resources are available.
- Reject queries when CPU usage exceeds: Set a % CPU usage limit. For example, enter
- Select Create workload group.
Modifying workload group settings
To modify the settings for a specific workload group, perform the following steps:
- In the overview table, select the group name.
- Select the Settings tab.
- Modify the workload group’s configuration. For more information about the settings, see Creating a workload group.
- To update the settings, select Apply Changes.
Default workload group
The DEFAULT_WORKLOAD_GROUP cannot be edited. Its CPU and memory limits are always fixed at 100%. For this group, the Settings tab is disabled.