Creating visualizations in the Visualize application
The Visualize application uses a point-and-click interface to create data visualizations from aggregations. You select a visualization type, configure metrics and buckets, and adjust display settings to build charts, tables, maps, and other visual representations of your data.
Prerequisites
The examples on this page use the Sample flight data dataset that is already installed in OpenSearch Playground.
If you’ve installed a local OpenSearch Dashboards instance, add the sample data by following these steps:
- On the OpenSearch Dashboards home page, select Add sample data.
- In the Sample flight data panel, select Add data.
For more information, see Adding sample data.
To use your own data, you need an index pattern. See Setting up your data.
Navigating the Visualize UI
The following image shows the main components of the Visualize application.
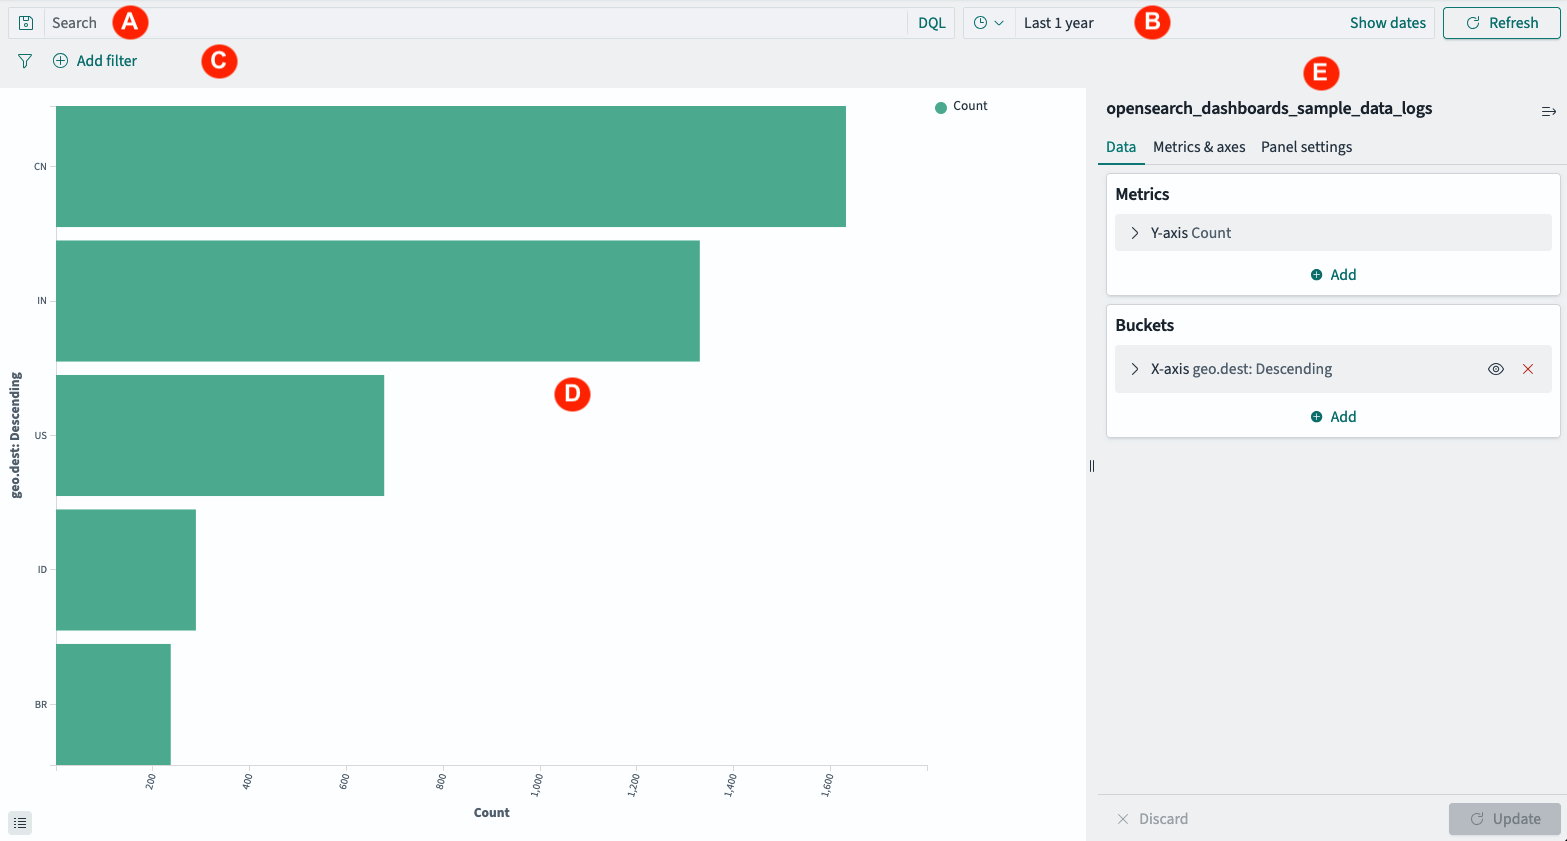
- The search bar (A) enables selection of data using a query language search. See Using the search bar.
- The time filter (B) provides a graphical interface for selecting data values and ranges. See Using the time filter.
- The filter tool (C) contains frequently used commands and shortcuts. See Using the filter tool.
- The visualization panel (D) displays the visualization.
- The configuration panel (E) contains all the controls to select and configure the visualization. Its contents depend on the visualization type. See Configuring visualizations.
Creating a visualization
To create a visualization, follow these steps:
-
In the left navigation menu, select OpenSearch Dashboards > Visualize.
The application displays the Visualizations list, a table of saved visualizations.
-
In the upper-right corner, select Create visualization.
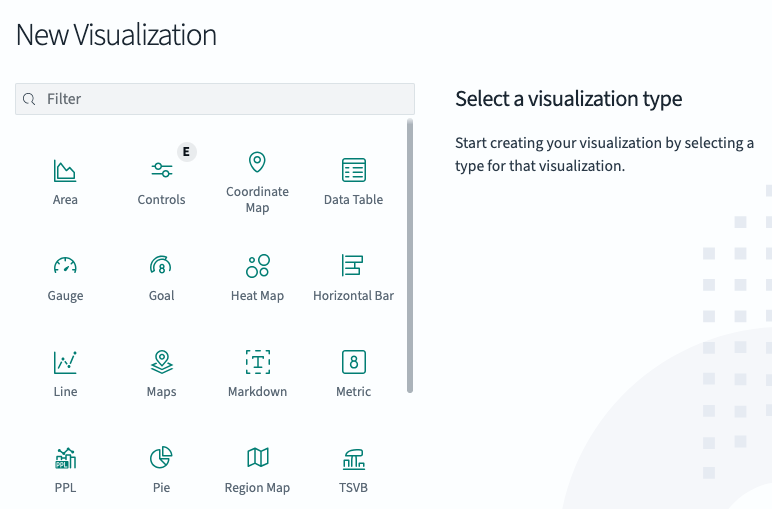
The application displays the New Visualization dialog, as shown in the following image.
-
Select a visualization type by choosing its icon. For help choosing a type, see Visualization types.
-
If prompted, select an index pattern in the Choose a source dialog. Not all visualization types display this dialog. For examples of creating each visualization type, see the individual visualization type pages.
The default visualization shows a single value, the document count, for the current dataset.
If the visualization shows no data, or a count different than expected, verify that the search bar, filter tool, and especially the time filter are not filtering out the missing documents.
-
Configure the visualization. For more information, see Configuring visualizations or the individual visualization type pages. For a complete example, see Explore the Visualize application.
Other ways to start creating a visualization
In addition to the Visualize application, you can start creating a new visualization from the following locations:
-
To create a visualization from a workspace (if workspaces are enabled), follow these steps:
- On the home page, select or create a workspace.
- In the left navigation menu, expand Visualize and report and select Visualizations.
- Select Create new visualization.
-
To create a visualization from a dashboard, follow these steps:
- In the left navigation menu, select OpenSearch Dashboards > Dashboards.
- Open an existing dashboard or create a new one.
- Select Edit.
- Select Create new in the toolbar, or select Add (or the plus icon) and then select Create new in the Add panels dialog.
When you create a visualization from a dashboard, it is automatically added to that dashboard when you save.
Saving a visualization
Your visualization remains in the Visualize application if you leave the application. However, if you select the Visualize application again without saving the visualization, changes to the visualization are lost. We recommend always saving your visualization before you leave the Visualize application.
Saving a new visualization
To save a new visualization, follow these steps:
-
Select Save in the upper right of the Create panel.
The application displays the Save visualization dialog.
-
Enter a title for the visualization in the Title box.
-
(Optional) Enter a Description.
-
Select Save.
Saving an existing visualization
You can save a visualization at any time, as often as you like.
To save an existing visualization, follow these steps:
-
Select Save in the upper right of the Create panel.
If you have previously saved the visualization, the Save visualization Title box contains the visualization title.
-
(Optional) To change the visualization name, enter a new title for the visualization in the Title box.
-
(Optional) Update the Description.
-
(Optional) To leave the saved visualization in its current state and save the changes as a new visualization, select Save as new visualization.
Saving an existing visualization without selecting Save as new visualization overwrites the previous state of the visualization, even if you’ve renamed the visualization.
-
To save the current changes, select the Save button.
Adding a visualization to a dashboard
To add a saved visualization to a dashboard, follow these steps:
- Open a dashboard.
- Select Edit.
- Select Add or the plus icon in the toolbar. If prompted, select From library.
- Select the saved visualization from the list.
The visualization appears as a panel on the dashboard. You can resize, reposition, and configure it alongside other panels.
Try it
For a hands-on walkthrough of creating a line chart with sample data, see Explore the Visualize application.
Next steps
- To learn how to create various visualizations using sample data, see Creating aggregation-based visualizations.
- For help choosing a visualization type, see Visualization types.
- To learn about adding visualizations to dashboards, see Creating dashboards.