Using the filter tool
The filter tool is at the top of the Discover and Dashboard and Visualize applications, directly below the Search bar. Use it to add and remove discrete filters to the data displayed in those applications.
You can create any number of filters. Filters are listed in the filter display between the ![]() (funnel) icon and the
(funnel) icon and the ![]() (circle-plus) Add filter control.
(circle-plus) Add filter control.
Navigating the filter tool

The following components make up the filter tool.
- The
 (funnel) icon (A) provides a drop-down menu of filter options.
 - The filter list (B) shows the currently defined filters.
 (circle-plus) Add filter (C) provides a popover menu for adding data filters.
Adding a filter
To add a filter using the Add filter tool, follow these steps:
-
Select
(add) Add filter. -
In the Edit filter popover, choose a data field.
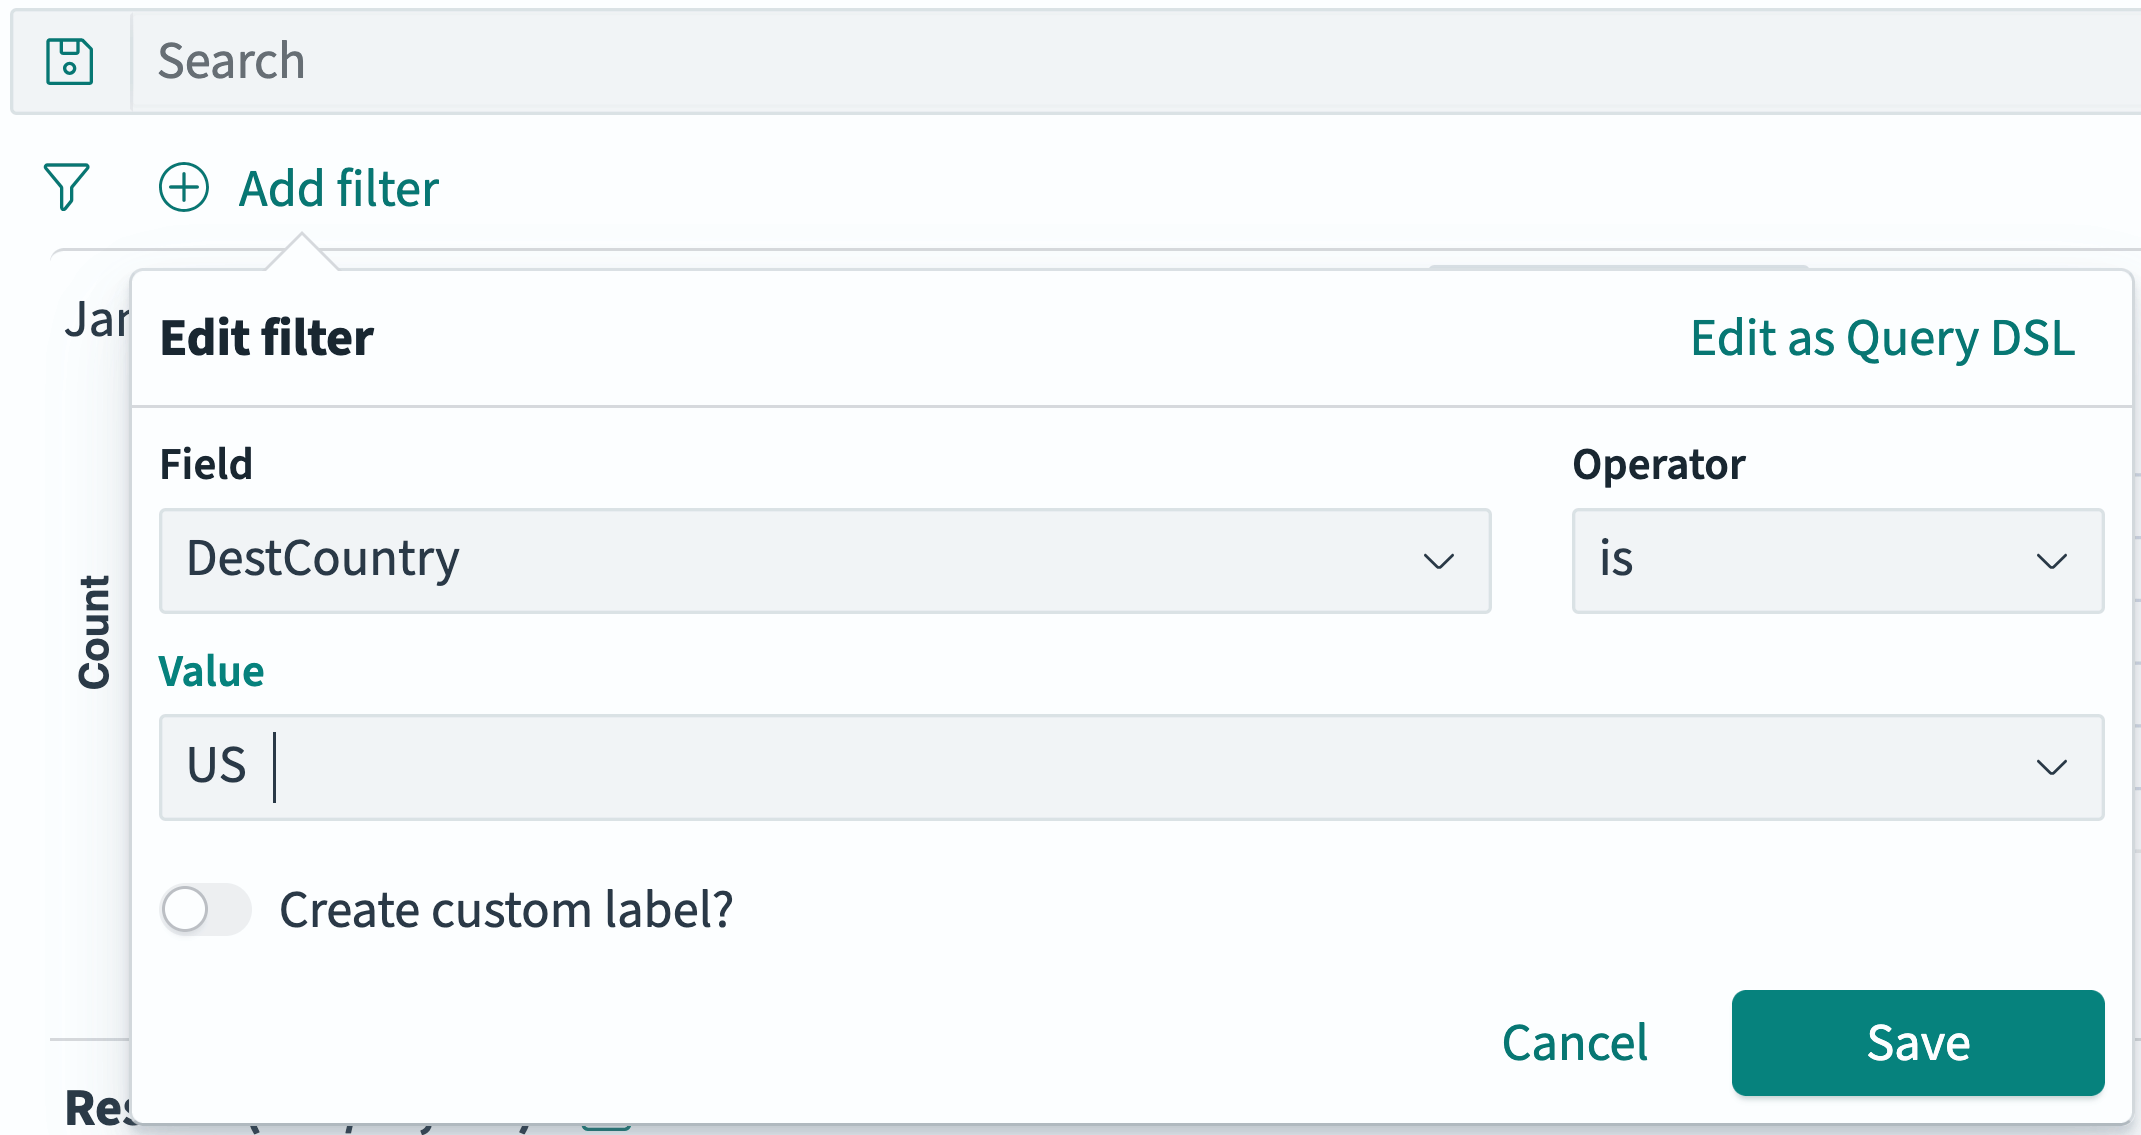
-
In the Operator field, choose an operator.
The Operator dropdown choices are determined by the chosen data field’s type.
The Value field appears if needed.
-
If required, in the Value field, enter or select a value.
The Value entry mode and choices are determined by the chosen operator and data field type.
-
(Optional) Choose Create custom label?.
The custom label replaces the default label composed of the data field name and operator.
-
Select Save.
Editing a filter
To change an existing filter, follow these steps:
-
Select the filter in the filter list.
-
In the filter dropdown, select Edit filter>.
-
In the Edit filter popover, change the Field, Operator, or Values as needed.
-
(Optional) Add or change the Custom label.
-
Select Save.
Removing a filter
To remove a filter, choose the ![]() (cross) icon to the right of the filter name.
(cross) icon to the right of the filter name.
Disabling a filter
You can disable a filter temporarily without removing it from the filter list. To disable a filter, follow these steps:
-
Select the filter in the filter list.
-
In the filter dropdown, select Temporarily disable.
Disabled filter names are shown in
strikethroughtext.
Re-enabling a filter
To enable a disabled filter, follow these steps:
-
Select a
disabledfilter in the filter list. -
In the filter dropdown, select Re-enable.
Pinning a filter
You can pin a filter so that it applies to all the applications in OpenSearch Dashboards (Discover, Dashboards, and Visualize). To pin a filter, follow these steps:
-
Select the filter in the filter list.
-
In the filter dropdown, select Pin across all apps.
Unpinning a filter
To unpin a filter that has been pinned to all apps, follow these steps:
-
Select the filter in the filter list.
-
In the filter dropdown, select Unpin.
Modifying all filters as a group
You can use the ![]() (funnel) Filters pulldown to change all the filters at once in several ways.
(funnel) Filters pulldown to change all the filters at once in several ways.
Modifications made with the ![]() (funnel) Filters pulldown apply only to the filters in the filter list, not to the query in the Search bar or to the time filter.
(funnel) Filters pulldown apply only to the filters in the filter list, not to the query in the Search bar or to the time filter.
Enabling or disabling all the filters
To enable or disable all filters, follow these steps:
-
Select the
(funnel) icon. -
In the Filters pulldown, select Enable all or Disable all.
Inverting which filters are enabled
To exclude all included filters and include all excluded filters, follow these steps:
-
Select the
(funnel) icon. -
In the Filters pulldown, select Invert enabled/disabled.
Inverting the sense of inclusion for all filters
To negate all filter expressions so that all included documents are excluded and all excluded documents are included, follow these steps:
-
Select the
(funnel) icon. -
In the Filters pulldown, select Invert inclusion.
Exclusion filters have NOT appended to their title, as shown following. Inverting inclusion a second time removes the NOT modifier.

Disabled filters are inverted, but remain disabled.
Pinning or unpinning all filters
To pin or unpin all filters in all OpenSearch Dashboards applications (Discover, Dashboards, and Visualize), follow these steps:
-
Select the
(funnel) icon. -
In the Filters pulldown, select Pin all or Unpin all.
Removing all filters
To remove all filters from the filter list, follow these steps:
-
Select the
(funnel) icon. -
In the Filters pulldown, select Remove all.